Random Crafting

/ Friday, June 29, 2012 /
There were so many amazing crafts that linked up to this weeks MMM
I just couldn't wait until next week to feature them. 
Here are a couple of great ideas that you can try out this weekend.


This fun Desktop Gumball Machine was made from a candy dish and a flower pot!!


From Overwhelmed to Organized shared how she managed to keep her closet organized.


Transformations From the Heart made this fun coat rack with the help of her daughter.


Decorate With a Little Bit shares some great tips on where to hang artwork.


Whimsical Perspective shares her beautifully recovered chair.

Hope you found some inspiration to keep you busy this weekend.


Don't forget to VOTE for me!!


Visit Top Mommy Blogs To Vote For Me!

This post is sponsored by Social Spark. 
Get paid to blog!!
Set Your Price. Choose your Advertisers. Sign up for SocialSpark!

Happy 4th!!

/ Thursday, June 28, 2012 /
4th of July is just around the corner!
Check out this amazing wreath made by The Scrap Shoppe.


I love the rustic look of it. 
With a few simple supplies and a couple hours you could have this baby hanging on your door before the festivities begin. 
Click HERE for full tutorial

Happy Crafting

Don't forget to VOTE for me!!


Visit Top Mommy Blogs To Vote For Me!

This post is sponsored by Social Spark. 
Get paid to blog!!
Set Your Price. Choose your Advertisers. Sign up for SocialSpark!

How to de-pit a cherry

/ Wednesday, June 27, 2012 /
For the past couple years I have tried to avoid buying fresh cherries. Don't get me wrong! I absolutely love cherries. However, when your a mom of young kids you know that your kids "have" to eat whatever you are eating and cherries are just not that great for 2 year olds. With the large pit in the center it is easy for a child to choke.
I've tried cutting them in half and removing the seed but since there is a seed in the center you can't just slice the cherry in half. You have to cut all the way around the seed and then try to rip the flesh from the seed. This always resulted in a huge mess for me and I always ended up with large chunks of flesh still stuck to the seed.
My other options were to hide the cherries in the back of the fridge and only eat them when the kids were napping, outside, or after they went to bed. Or just not buy them at all.
On our recent trip to the grocery store we discovered cherries on sale and couldn't pass them up. From the moment the girls saw them go in the cart they were begging to have some. Once we got home I tried once again to cut them in half and remove the pit but after 4 cherries resulting in a pulpy mess I thought there had to be another way. Then I got an idea.
Using a silly straw we had in the pantry I was able to push the pit out of the cherry. It was actually a lot easier than I had expected and left very little mess.
(p.s. In the following photos my hands look really dirty. I promise they are clean! I just finished staining some wood and of course did not use gloves so it stained my hands as well. Please don't judge me )

Grab a straw.


Place the end of the straw against the side of the cherry where the stem was removed.


Holding the cherry firmly, push the straw through the cherry until the pit pops out the other end.


From here you can easily slice the cherries in half, serve them whole, or freeze them and use for smoothies.


Did you enjoy this post?
Don't forget to VOTE for me!!


Visit Top Mommy Blogs To Vote For Me!

This post is sponsored by Social Spark. 
Get paid to blog!!
Set Your Price. Choose your Advertisers. Sign up for SocialSpark!


More Duct Tape Fun

/ Tuesday, June 26, 2012 /
If you missed my first duct tape post you can view it HERE.

My oldest is learning to write her letters and will go through a stack of paper in a day if I let her. 
To save on paper I decided to make a dry erase board that she can practice on and then erase and start over whenever she wants to. 


I started by cutting a piece of cardboard (one side of a cereal box) to the same size as a standard sheet of paper. 


I sliped the cardboard into a plastic sheet protector. I placed a blank sheet of paper on one side of the cardboard and a handwriting sheet on the other side. 


Then I added some duct tape to all four sides of the sheet protector.


And voila... DIY dry erase boards. 

Did you enjoy this post?
Don't forget to VOTE for me!!


Visit Top Mommy Blogs To Vote For Me!

Duct Tape Fun

/ Monday, June 25, 2012 /
I recently received a package full of some fun patterned Duct Tape.
I was so excited but was soon overwhelmed with the amount of amazing projects that you can make with Duct Tape. 
I finally settled on creating some fun storage boxes.

 I've been using a couple of old boxes for toy storage. They fit perfectly inside our cubbies and where the perfect size for holding our legos and puzzles.
However, they were far from pretty. 

I fell in love with this orange and white giraffe print!!
Paired up with the neon green, I knew it would be a fun and bright addition to our classroom.


When I started covering the boxes I noticed that the image on the box was visible through the Duct Tape. To solve this I cut some white printer paper to the same size as the boxes, added a dot of glue to each corner and glued it to the box before taping. I used the giraffe tape for the bottom half of the box and then I folded down the flaps on the box (which were originally tucked inside the box) and covered them with the green tape. 


I then decided to make some dry erase labels for the boxes. 
I used some scrapbook paper, plastic sheet protectors and Duct Tape to make the labels. 
Cut a piece of scrapbook paper and plastic sheet protector the same size (whatever size you want your label to be.


Place dust tape on all 4 sides of the back side of your scrapbook paper leaving about a quarter inch hanging over (You can also cut the duct tape in half length wise to save on tape.) 


Place your piece of plastic in the center and fold the edges of tape over sticking them to the plastic. 


I used a purple permanent marker so that it won't wipe off. If I ever want to change the labels I'll just use this trick to erase them and write something else.

A few facts about Scotch Duct Tape:
  • Scotch Duct Tape comes in 15 colors, 16 patterns and ten combination packages.
  • Pricing: $3.47 - $4.99 for rolls and $4.49 - $5.29 for combination packs.
  • Scotch Duct Tape can be found at Target, Orchard Supply Hardware, Office Depot, Kmart, Lowe's, Meijer, Fred Meyer, and BJ's.

Did you enjoy this post?
Don't forget to VOTE for me!!


Visit Top Mommy Blogs To Vote For Me!

This post is sponsored by Social Spark. 
Get paid to blog!!
Set Your Price. Choose your Advertisers. Sign up for SocialSpark!


More the Merrier Monday #66

/ Sunday, June 24, 2012 /
WOW! Can you believe that it is almost July?
This summer is going by way too fast!!
I hope you all had a chance to check out the great link-ups to last weeks link party but if you missed it, here are a few of my favorites. 

The Sasse Life made over an entertainment center for their son. This looks like so much fun. What a lucky little man. 


The Shabby Gals found a pair of owls at a yard sale and after a quick coat of spray paint they were transformed into these beauties.


Over at Green PBnJs you can learn how to repair a hole in your wall. This is a very useful tip that everyone should know.


The life of an "ordinary" wife made some fabulous wall art using confetti.
 
If you have been featured PLEASE grab a button


Guidelines:

1. Please link directly to your post and NOT just to your blog.
2. PLEASE LINK BACK TO DIY HOME SWEET HOME OR GRAB THE MORE THE MERRIER BADGE.
3. Please Follow DIY Home Sweet Home.
4. Please follow me of Facebook (link on the left)
5. Please visit as many links as you want and leave comments.

Don't forget to VOTE for me!!


Visit Top Mommy Blogs To Vote For Me!

This post is sponsored by Social Spark. 
Get paid to blog!!
Set Your Price. Choose your Advertisers. Sign up for SocialSpark!


The Magic of Hairspray!

/ Friday, June 22, 2012 /
I am so excited to share this tip with you!! 
You can get permanent marker off of almost any smooth surface with one simple ingredient.

HAIRSPRAY!!

 
We are redoing our floors and we use permanent marker to mark our cuts. The boards have a smooth surface and I know that with dry erase boards you can color over the permanent marker with a dry erase marker and it will wipe off so I wasn't too worried about making a mistake.
Of course, it wasn't too long after we started that I was able to test my theory. 
We ended up marking the wrong end of a board. I quickly grabbed a green (the only color I could find) dry erase marker, colored over the permanent marker and wiped it off. 
Well the permanent marker faded but was still visible, and the dry erase marker left some nasty green smudges that would not come off.
 I thought back to a recent post I wrote on how to remove permanent marker from almost anything.
I remembered that hairspray was one of the items that popped up a lot in the post.
I ran to the bathroom, grabbed the hairspray and gave the are a few sprays. 
Like magic, the marker (dry erase and permanent) started to liquify and dissolve before my eyes. 
With one quick wipe of the paper towel, it was gone. 
I was simply amazed!!
Then the wheels started turning. I wonder what else this would work on?
Then I went crazy!!
No, I'm not kidding! Just check out all of the things I tested it on. 

(Please read the notes at the bottom before trying this)


 *Update: While I was writing this post my girls got a hold of the permanent marker and drew a pretty picture for me on the side of our island. I used the last of my hairspray on the above experiments  and only had enough left to wipe off about a third of it. I posted the photo on my personal Facebook account a friend replied with a tip to use OFF bug spray. Since I was out of hairspray I decided to give it a try. It worked just as well as the hairspray!! However, the bug spray did smell pretty bad so I would suggest using it as a last resort. Especially if you are going to be using a lot of it like I had to.


NOTES:
  • This will work on most smooth, glossy surfaces. Do not try on rough non-glossy surfaces.
  • The hairspray did leave a sticky film on some of the surfaces (such as the mirror) this can be easily cleaned off with Windex.
  • Most of the above experiments were wiped of within a few minutes after I wrote on them. I do not know if it will be as easy to erase once the marker has set. The marker on wood/ laminate floors was there for 3 days before I erased it and it came off perfectly!!
  • Please be sure to test in an unnoticeable area before going crazy with the permanent marker. I found that I had to scrub a little to get it off of the dishwasher and washing machine. I am not responsible for any damage that occurs if you attempt this. 
  • The hairspray I used TRESemme strong hold. I would think most (or all) other hairsprays would work just as well however, I can not guarantee that.
Did you enjoy this post?
Don't forget to VOTE for me!!


Visit Top Mommy Blogs To Vote For Me!

This post is sponsored by Social Spark. 
Get paid to blog!!
Set Your Price. Choose your Advertisers. Sign up for SocialSpark!


    Step up your wardrobe this summer

    / Thursday, June 21, 2012 /
    Check out these fun clothes and accessories that link up to this weeks MMM.


     A Rosie Sweet Home made this beautiful shirt from an old skirt. 


    You can find a tutorial to make your own color block shoes at Vixen Made.

    Etcetorize made the most adorable shirt using a large scarf.

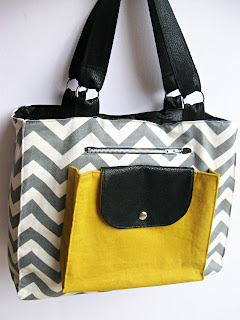
    Show Tell Share made this fun city tote. Although there is no tutorial yet, I am hoping she will make one.

    Can you believe these shoes used to be silver? A Rosie Sweet Home shares how she did it.


    The tutorial for this skirt turned tote is not in English. However, there are lots of detailed photos to help you out. You can find it at maarnietvangrijs


    Copyright © 2010 Home Sweet Home, All rights reserved
    Design by DZignine. Powered by Blogger