What you first open GIMP you should have 3 windows pop up. The window on the left is my Layers, Channels, and Paths window. The one on the Right is my Toolbox. And the main window in the center. The main window should always pop up when you open the program, however, if you are missing one of the other two windows you can always find them under the 'Windows' tab.

To open a photo up in Gimp you can either click File---> Open and then find your image. Another way you could open an image is by clicking on your image and dragging it over to the GIMP window.

Once you bring up your photo you can crop it using the crop tool. With the crop tool selected you can now select the area of your photo you you want to be cropped, then move your mouse to the center of that area and click again. This will crop your photo.

After cropping your photo you can play around with the color. Click on the 'Color' tab and a menu will drop down with a ton of options. My favorite is the 'Curves' tool but I highly encourage you to play around will all of them so that you know what each one does.

If you are not comfortable editing the color yourself, you could start our by choosing one of the presets located in the drop down menu.
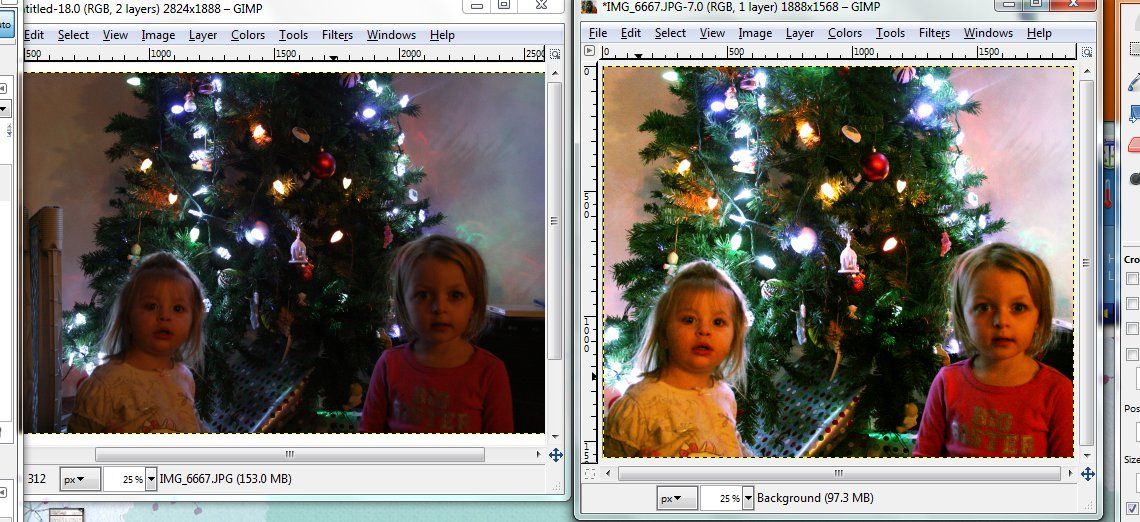
Here is a before and after shot of the image. Sorry the image is not that great. It was the only unedited photo I could find.
Once you are done editing you photo you will want to save it. Click File ---> Save As. GIMP will automatically save your file as '.xcf''. If you want to go back and edit your photo later then you can leave it like this. However, if you are done editing and want to use this file as an actual image, you need to change the '.xcf' to '.jpg' (if there is no '.xcf' then just add '.jpg' after the file name. Once you change this and click 'Save' a window will pop up asking you to EXPORT your image. Click 'Export' than 'Save' and you are done!!
To open a photo up in Gimp you can either click File---> Open and then find your image. Another way you could open an image is by clicking on your image and dragging it over to the GIMP window.
Once you bring up your photo you can crop it using the crop tool. With the crop tool selected you can now select the area of your photo you you want to be cropped, then move your mouse to the center of that area and click again. This will crop your photo.
After cropping your photo you can play around with the color. Click on the 'Color' tab and a menu will drop down with a ton of options. My favorite is the 'Curves' tool but I highly encourage you to play around will all of them so that you know what each one does.
If you are not comfortable editing the color yourself, you could start our by choosing one of the presets located in the drop down menu.
Here is a before and after shot of the image. Sorry the image is not that great. It was the only unedited photo I could find.
Once you are done editing you photo you will want to save it. Click File ---> Save As. GIMP will automatically save your file as '.xcf''. If you want to go back and edit your photo later then you can leave it like this. However, if you are done editing and want to use this file as an actual image, you need to change the '.xcf' to '.jpg' (if there is no '.xcf' then just add '.jpg' after the file name. Once you change this and click 'Save' a window will pop up asking you to EXPORT your image. Click 'Export' than 'Save' and you are done!!


0 comments:
Post a Comment